
The purpose of this guide is to show how to use the create-cloudflare Command Line Interface (CLI) or C3 to create a new project directory, with Cloudflare dependencies but configured for SvelteKit and TailwindCSS.
Since this article was originally published, a number of significant changes have occurred. Firstly a new Command Line Interface (CLI) for Svelte has been launched called sv that also includes a number of convenience packages via it’s own add command. As such the original Svelte-Add utility has been deprecated.
Therefore, although the GitHub repository is still valid, the original instructions are now deprecated.
Only two commands are required:
# Create cloudflare project
bun create cloudflare@latest dummy -- --framework=svelte

# Add TailwindCSS via svelte-add
npx @svelte-add/tailwindcss@latest --typography trueThe guide is based on the official SvelteKit guide from Cloudflare and the Svelte-Add configuration utility. Alternatively, use the manual approach specified in the TailwindCSS guide from TailwindCSS.
The repository created using this guide is available on GitHub:
Cloudflare Setup
The following command launches the Cloudflare wizard, which requests a number of inputs such as type of Project and Framework. Followed by SvelteKit inputs such as Svelte template and support for Type checking.
cloudflate-create
# Create cloudflare project
bun create cloudflare@latest dummy -- --framework=svelte

using create-cloudflare version 2.21.9

╭ Create an application with Cloudflare Step 1 of 3
│
├ In which directory do you want to create your application?
│ dir ./dummy
│
├ What type of application do you want to create?
│ type Website or web app
│
├ Which development framework do you want to use?
│ framework Svelte
│
├ Continue with Svelte via `bunx [email protected] dummy --framework=svelte`
│


create-svelte version 6.3.2

┌  Welcome to SvelteKit!
│
◇  Which Svelte app template?
│  Skeleton project
│
◇  Add type checking with TypeScript?
│  No
│
◇  Select additional options (use arrow keys/space bar)
│  Add Prettier for code formatting
│
└  Your project is ready!

Install more integrations with:
  npx svelte-add

Next steps:
  1: cd dummy
  2: bun install
  3: git init && git add -A && git commit -m "Initial commit" (optional)
  4: bun run dev -- --open

To close the dev server, hit Ctrl-C

Stuck? Visit us at https://svelte.dev/chat

├ Copying template files
│ files copied to project directory
│
├ Installing dependencies
│ installed via `bun install`
│
╰ Application created

╭ Configuring your application for Cloudflare Step 2 of 3
│
├ Installing wrangler A command line tool for building Cloudflare Workers
│ installed via `bun install wrangler --save-dev`
│
├ Retrieving current workerd compatibility date
│ compatibility date 2024-07-01
│
├ Adding the Cloudflare Pages adapter
│ installed @sveltejs/adapter-cloudflare
│
├ Changing adapter in svelte.config.js
│
├ Adding Wrangler files to the .gitignore file
│ updated .gitignore file
│
├ Updating `package.json` scripts
│ updated `package.json`
│
├ Do you want to use git for version control?
│ yes git
│
├ Initializing git repo
│ initialized git
│
├ Committing new files
│ git commit
│
╰ Application configured

╭ Deploy with Cloudflare Step 3 of 3
│
├ Do you want to deploy your application?
│ no deploy via `bun run deploy`
│
├  APPLICATION CREATED  Deploy your application with bun run deploy
│
│ Navigate to the new directory cd dummy
│ Run the development server bun run dev
│ Preview your application bun run preview
│ Deploy your application bun run deploy
│ Read the documentation https://developers.cloudflare.com/pages
│ Stuck? Join us at https://discord.cloudflare.com
│
╰ See you again soon!
TailwindCSS Installation
The easiest method to add TailwindCSS support is to use svelte-add utility. Navigate to the TailwindCSS page: 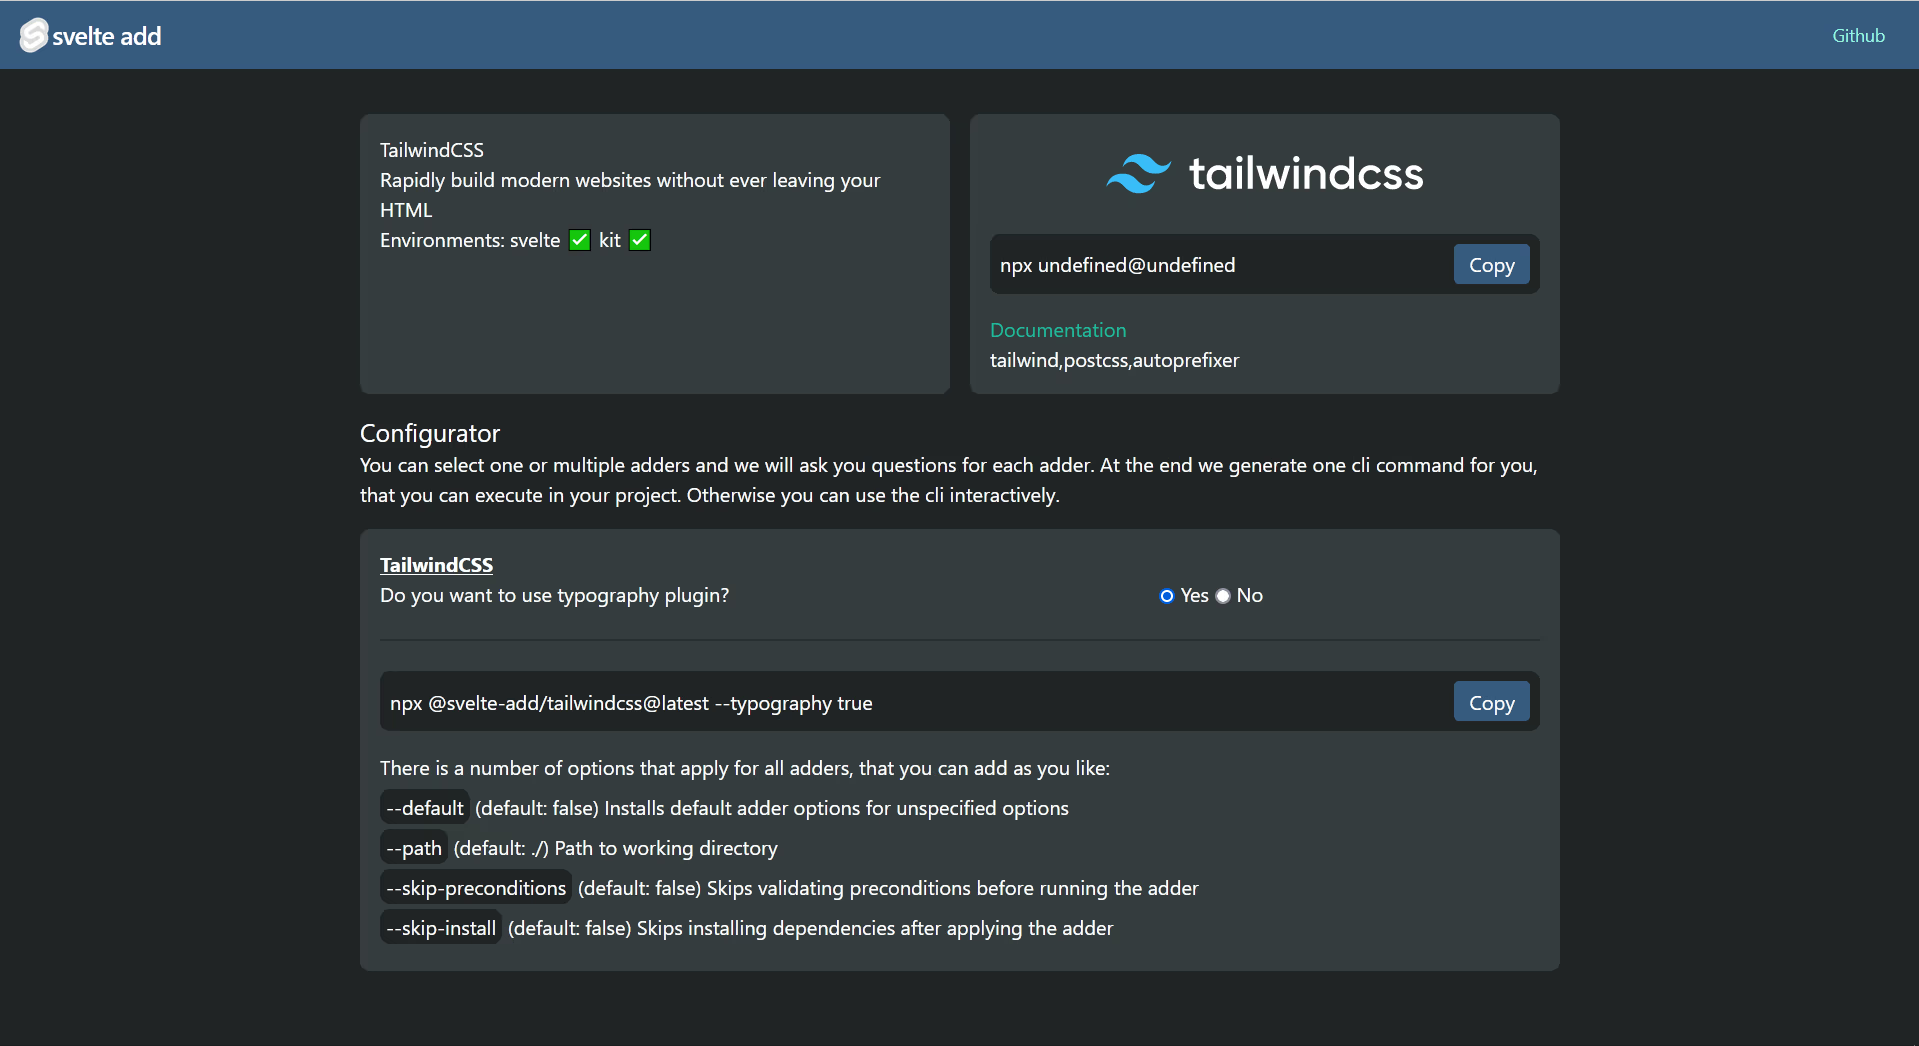
Make the typography choice and copy the command:
svelte-add.sh
# Add TailwindCSS via svelte-add
npx @svelte-add/tailwindcss@latest --typography true

Need to install the following packages:
  @svelte-add/[email protected]
Ok to proceed? (y) y
npm WARN deprecated @svelte-add/[email protected]: Package no longer supported. Please use npx svelte-add tailwindcss
@svelte-add/tailwindcss version 1.0.17

┌  Welcome to Svelte Add!
│
◇  Successfully installed dependencies
│
◇  Successfully formatted modified files
│
└  You're all set!
Validation & Post-Install Config
The two commands provide a working configuration for all three elements: the ability to deploy on Cloudflare, use the SvelteKit framework and utilise TailwindCSS.
The code below illustrates how the C3 tool has updated the svelte.config.js file:
svelte.config.js
1import adapter from "@sveltejs/adapter-cloudflare";

/** @type {import('@sveltejs/kit').Config} */
const config = {
  kit: {
    adapter: adapter()
  }
};

export default config;- 1
-
The default
adapter-autohas been replaced withadapter-cloudflare.
For TailwindCSS we have to check multiple files, the first is svelte.config.js above. To enable processing <style> blocks as PostCSS, insert the following line:
svelte.config.js
- 2
-
Import the
vitePreprocessplugin. - 3
- Register plugin.
The svelte-add utility has already configured and registered the template files:
tailwind.config.js
/** @type {import('tailwindcss').Config} */
export default {
1  content: ['./src/**/*.{html,js,svelte,ts}'],

  theme: {
    extend: {}
  },

  plugins: [require('@tailwindcss/typography')]
};- 1
-
Note the addition of
sveltefiles.
The Cascading Style Sheets (CSS) under the src folder has also been updated:
app.css
@tailwind base;
@tailwind components;
@tailwind utilities;
This is directly imported into the default route at +layout.svelte:
+layout.svelte
<script>
    import '../app.css';
</script>

<slot></slot>
Deployment
To test the configuration, update the +page.svelte with some TailewindCSS classes:
src/routes/+page.svelte
<div class="flex flex-col items-center justify-center h-screen">
  <h1 class="text-4xl text-amber-800 font-bold">Curious Data Explorer</h1>
  <p class="bg-amber-300/50 p-2 rounded-xl">Visit our blog: <a href="https://blog.curiodata.pro">https://blog.curiodata.pro</a></p>
</div>
Run the development server with:
# Run dev server
bun run dev

2:28:09 PM [vite] hmr update /src/routes/+page.svelte, /src/app.css (x11)
The output should reflect the TailwindCSS classes:

That concludes this guide, which using two commands configured a Cloudflare project with SvelteKit and TailwindCSS.
Attribution
Images based on:
Citation
@online{2024,
  author = {, miah0x41},
  title = {Cloudflare, {Svelte} and {TailwindCSS} {Template} and
    {Starter} {Kit}},
  date = {2024-07-06},
  url = {https://blog.curiodata.pro/posts/07-svelte-cloudflare/},
  langid = {en}
}